Thursday, April 30, 2009

Salmon Nicoise Salad Rolls--Barefoot on a Budget Challenge

An extra Thursday this month brings an extra optional Barefoot Bloggers challenge. This Barefoot on a Budget Challenge, is all about making one of Ina's recipes on a budget. As much as we all love Ina, I think everyone making her recipes each month has dropped a good hunk of dinero on the ingredients. Whether it is a special cheese, an obscure liqueur, lots of saffron, or all that butter, the list is pretty endless, pretty pricey, and often hard to find. The results are usually fabulous as Ina is a great cook, but for this challenge we voted to select one of Ina’s recipes to make a bit more economical and see if we can get "Barefoot results on a bare-bones budget." The winning recipe? Lobster Cobb Salad Rolls. 

Our mission is to take Ina's recipe and make it more budget-friendly. Changing the ingredients, the cooking method or even the format of the recipe; basically we are free to do anything as long as the end result somewhat resembles the original recipe. You can find Ina's recipe for the Lobster Cobb Salad Rolls on the Food Network website, here.


I decided to keep a seafood theme and also Ina's idea of taking a classic salad and making it into a sandwich, and of course I wanted to make my recipe healthy too, so I came up with Salmon Nicoise Salad Rolls. Nicoise salad is a speciality of the Nice region of France and typically contains green beans, new potatoes, tomatoes, olives, hard boiled egg, and tuna, among other things. I decided to use salmon, to boost the nutritional content and get some of those mighty Omega-3s. Because I wanted to pick the most simple and economical ingredients possible, I chose canned salmon. All of the ingredients are easy to find in most grocery stores or markets and are relatively inexpensive. It might seem a bit strange to have green beans and potatoes on a sandwich, but since my Coronation Chicken Salad with its chunks of potato and cucumber was so great as a sandwich, I thought it would be fun to try.

Salmon Nicoise Salad Rolls
by Deb, Kahakai Kitchen
(Makes 6-8 sandwiches)

For Vinaigrette
juice of 1 lemon
1/3 cup extra-virgin olive oil (plus extra for toasting rolls)
1 medium shallot, minced
1 Tbsp minced fresh thyme leaves
1 teaspoon Dijon mustard
Salt and freshly ground black pepper

6-8 of your favorite rolls (I used a multi-grain ciabatta roll)

For Salad:
8-10 small new potatoes (about 1-1 & 1/4 pounds), scrubbed 
1/2 lb green beans, cleaned, trimmed and cut into bite size pieces
1 7.5-ounce canned pink or wild salmon, drained 
8-10 cherry tomatoes 
1/2 cup olives, green or nicoise, pitted and quartered
2 Tbsp capers, rinsed and drained
2 Tbsp flat-leaf parsley, chopped coarsely
2 hard boiled eggs, peeled and sliced

Pre-heat oven to 350 degrees F.

Whisk lemon juice, olive oil, shallot, thyme, and mustard in a small bowl; season to taste with salt and pepper and set aside.

Split rolls, place on a baking sheet, brush or drizzle with olive oil and bake for 5-7 minutes, until lightly toasted.  Set aside

Bring potatoes and 3 quarts cold water to boil in a large pot. Add 1 tablespoon salt and cook until potatoes are tender, 7-10 minutes (depending on size of potato). Remove potatoes from water, (saving cooking water), drain and let cool. Quarter, or chop potatoes into bite-size chunks and set aside in a large bowl. Return potato cooking water to a boil and add green beans. Cook until tender but crisp, 3 to 5 minutes. Drain beans, transfer to ice water for a few minutes, drain well and add to bowl with potatoes. Add salmon, tomatoes, olives, capers and parsley to the bowl and mix together gently. Add vinaigrette and lightly toss. Taste and add additional salt and pepper if needed.


Place 1/2 of toasted roll on a plate. Place a small mound of salad mixture on roll and garnish with 2-3 slices of egg and place top of roll on or beside. Serve.


Notes/Results: Good! I liked the combination of different flavors and textures in the sandwich and how the vinaigrette soaked into the nooks and crannies of the toasted ciabatta bread. Because everything is bite size, it is filling but not too heavy and it is pretty healthy too. The one drawback is that it is a bit messy, but you could easily serve it open-faced with a knife and fork if you wanted a bit more of an elegant presentation and to make it easier to eat. It was hard to get a good picture--I promise it looked better in person! I was not able to do a price comparison because frankly I couldn't find any lobster at three different grocery stores here to get a price. The canned wild Alaskan salmon I buy is about $5.00 for a 7.5-ounce can, which with the other ingredients, would easily make 6-8 good sized sandwiches and would be much less than the cost of the 1 & 1/2 pounds of lobster meat in Ina's sandwich. You can find less expensive salmon, I just used what I had on hand. I ate a couple of sandwiches and enjoyed the rest of the mix as a salad. I would make this again.


This was an interesting challenge and it was fun to re-work Ina's recipe into something different. You can see which other Barefoot Bloggers attempted this optional challenge by going to the BB site here.

Tuesday, April 28, 2009

Quick Banana Ice Cream = A Tropicalicious Sundae

It is an inevitable occurrence that all the apple bananas in my CSA box ripen at exactly the same time. Much as I try to eat them up, I always have some overripe ones leftover and look for good recipes to use them up; usually muffins or bread. I found a recipe for Quick Banana Ice Cream, in April's Olive Magazine. I love ice cream and especially love quick, no fuss ice cream recipes and besides I figure if I am going to splurge occasionally, homemade ice cream is a good way to go. Wanting to use what I had on hand, I replaced the heavy cream with a can of coconut milk. Topped with some bananas, toasted coconut and toasted macadamia nuts, it is the perfect tropical sundae.


Quick Banana Ice Cream
Olive Magazine, April 2009
(Serves 4)
(Cook Time: 10 minutes + 2 Hours freezing)

4 ripe bananas, chopped into chunks
juice of 1/2 lemon
400 ml (13.53 fluid ounces) double cream (or 1 can coconut milk)
75 g golden caster sugar (about 5 1/4 Tbsp)

Whiz everything together in a food processor or blender. Pour into an ice cream maker and churn, (according to the manufacturer's directions) or pour into a freezer-proof box and freeze, stirring every two hours until the mixture solidifies. 

To make the Tropicalicious Sundae, layer banana slices in a bowl, top with ice cream and garnish with more banana and toasted unsweetened coconut flakes and toasted chopped macadamia nuts. Enjoy!


Notes/Results:  Yum! It is creamy and delicious. The banana taste is there but it isn't cloying. I really like the slight coconut flavor that adding the coconut milk gives it. I wanted to try it mostly as written so I used an organic unbleached cane sugar for this batch but I am going to play around with some other sweeteners like agave and see what that and some lite coconut milk does to it. Low-cal, no--but as a splurge, the fact that it has 4 simple ingredients and no preservatives is a good thing. It is excellent on it's own but the banana slices, coconut and nuts, really took it over the top. A definite keeper recipe. 

Monday, April 27, 2009

(Not) Tyler's (Not Deep-Dish or Ham) Quiche with Tyler's Herb and Asparagus Salad


April's Tyler Florence optional challenge, selected by our co-host Megan at My Baking Adventures is his Deep Dish Ham Quiche with Herb and Asparagus Salad. Although I like quiche, it is something that I will have maybe once or twice a year for lunch and be perfectly happy. I am also a bit picky about my quiche, it needs to be mostly meat or veggies and crust and not too "eggy" so "deep-dish" doesn't quite work for me, (I had visions of inches upon inches of egg). Actually given the choice between deep-dish pizza and thin crust or deep-dish apple pie and regular, I will take the regular over deep dish every time, I needs me a high crust ratio I guess. Also deep-dish and healthy just don't seem like they go together very well. Originally I was just going to cut Tyler's quiche down and try to make it a bit healthier, but not being a quiche expert, I thought I should call in the big guns, and look to one of my healthy cooking gurus, Ellie Krieger. I saw she had a recipe at Food Network, for a healthier quiche with onions, mushrooms and Gruyere cheese, made with non-fat evaporated milk and decided to look to her for the milk-egg part of the filling. I was going to use Tyler's crust and switch out the white flour but I got to reading about Ellie's, with its rolled oats and use of less butter and couldn't resist. (I did change it up a bit and use a white-wheat flour in place of the all-purpose flour). For the non-egg filling ingredients, I did my own thing, keeping the caramelized onions that are in both recipes, adding some asparagus and in order to get some of the savory-smokiness of Tyler's with ham, I decided to add a bit of smoked Gouda cheese. Finally because I don't need a whole quiche around here, I made a half recipe and used my mini-tart pans to make two small, individual quiches. 

So I may have "adapted" a bit too much, since it isn't actually Tyler's quiche but I did make quiche and Tyler's Herb and Asparagus Salad recipe to accompany it. In the end, I think Tyler is a collaborative kind of guy, so he won't mind! I kept it within the Food Network family, and I ended up with a delicious quiche that fits into my goals. I am posting both quiche recipes and my changes are noted above and in the Notes/Results section. 


(Tyler's quiche recipe can be found at the Food Network site here)

Deep-Dish Ham Quiche with Herb and Asparagus Salad
Tyler Florence
(Makes 10-12 servings)
Pastry:
2 cups all-purpose flour, plus more for dusting
1 teaspoon salt
1/4 teaspoon sugar
3/4 cup (1 & 1/2 sticks) unsalted butter, cold and cut into small chunks
1 large egg yolk
3 tablespoons ice water, plus more if needed

Filling:
3 tablespoons extra-virgin-olive oil
2 large Vidalia onions, sliced
3/4 pound smoked ham, cubed
8 large eggs
1 quart heavy cream
Kosher salt and freshly ground black pepper

Salad:
2 bunches asparagus (about 1 pound each), stems trimmed
4 ounces Parmesan, shaved with a peeler
2 handfuls fresh flat-leaf parsley, hand-torn
1 handful fresh mint, hand-torn
1 handful fresh dill, hand-torn
Extra-virgin olive oil
1/2 lemon, juiced
Kosher salt and freshly ground black pepper

To make the pastry: combine the flour, salt, and sugar in a large mixing bowl. Add the butter and mix with a pastry blender or your hands until the mixture resembles coarse crumbs. Beat the egg yolk and ice water in a small bowl to blend, add it to the pastry. Work it in to bind the dough until it holds together without being too wet or sticky. Squeeze a small amount together, if it is crumbly, add more ice water, 1 tablespoon at a time. Form the dough into a disk and wrap in plastic wrap; refrigerate for at least 30 minutes.

Sprinkle the counter and a rolling pin lightly with flour. Roll the dough out into a 14-inch circle about 1/4-inch thick. Carefully roll the dough up onto the pin (this may take a little practice) and lay it inside a 9-inch springform pan. Press the dough firmly into the bottom and sides so it fits tightly; trim the excess dough around the rim. Place the pan on a sturdy cookie sheet so it will be easier to move in and out of the oven, this quiche is pretty heavy.

Preheat the oven to 375 degrees F.

To make the filling: Heat a skillet over medium-low heat, coat the pan with oil, and add the onions. Slowly cook the onions, stirring, until they caramelize and release their natural sugars. Add a couple of tablespoons of water to help the onions break down, if needed. Toss in the ham, cook, stirring, for about 10 minutes to get some color on it. Remove from heat. In a large bowl, beat the eggs until frothy, pour in the cream; season with salt and pepper. Arrange the caramelized onions and ham over the bottom of the crust and carefully pour in the cream and egg mixture; the filling should be about 1-inch from the top of the pan. Cover loosely with foil and bake for 1 hour and 30 minutes. Remove the foil and continue to bake for 15 minutes or until the quiche is set, puffy, and jiggles slightly. Remove to a wire rack and let cool for 30 minutes. In the meantime make the asparagus salad.

To make the asparagus salad: In a large pot of boiling salted water, blanch the asparagus for 4 minutes, or until they are just crisp-tender. Drain the asparagus, transfer to a bowl of ice water to stop the cooking, and drain well. Slice the asparagus into 1/2-inch pieces and put them in a mixing bowl. Add the Parmesan and herbs, drizzle the herb and asparagus salad with olive oil, a squeeze of lemon juice, season with salt and pepper. Toss gently to combine.

Loosen the quiche from the sides of the pan by running a thin metal spatula around the inside rim. Carefully unmold the ring, and transfer the quiche (with the bottom base) to a serving plate. Cut it into wedges, drizzle with a little olive oil, and a few turns of freshly ground black pepper. Garnish with the asparagus salad on top.


(Ellie's quiche recipe can be found at the Food Network site here).
Caramelized Onion, Mushroom and Gruyere Quiche with Oat Crust
Ellie Krieger
(Makes 6 servings)

For the crust:
Cooking spray
3/4 cup rolled oats
1/2 cup all-purpose flour
1/4 teaspoon salt
3 tablespoons cold, unsalted butter, cut into small pieces
3 tablespoons cold, low-fat buttermilk

For the filling:
4 teaspoons olive oil
1 large onion, sliced thinly into half moons
8 ounces sliced mixed mushrooms, such as cremini, oyster, shiitake
1/2 teaspoon salt
1/4 teaspoon freshly ground black pepper
1/4 teaspoon dry mustard
1 tablespoon chopped fresh thyme leaves (or 1 teaspoon dry)
3 large eggs
3 egg whites
1 cup evaporated fat-free milk (not condensed milk)
2/3 cup grated Gruyere cheese (about 1-ounce)

Preheat the oven to 400 degrees F. Spray a 9-inch pie dish with cooking spray.

To prepare the crust, put the oats, flour and salt in the bowl of a food processor and pulse 3 times to combine. Add the butter and pulse about 12 times, until you get a pebbly course texture. Add the buttermilk and pulse 3 to 5 times more to combine. Form the mixture into a ball and place it between 2 large pieces of waxed paper. Roll out into a circle about 10 inches in diameter. Remove the top sheet of waxed paper. Transfer the crust, still on the other piece of waxed paper to the pie dish, then remove the waxed paper from the top. Press the crust gently into the dish. Bake for 9 minutes, then let cool.

To prepare the filling, heat 2 teaspoons of oil in a large nonstick pan over a medium-low heat. Add the onion and cook, stirring occasionally, until golden brown and caramelized, about 20 minutes. Transfer the onions to a bowl. Add the remaining 2 teaspoons of oil to the pan and heat over a medium-high heat. Add the mushrooms and cook, stirring occasionally, until they have released their water and begin to brown, about 6 minutes. Add the onions back to the pan, stir in the salt, pepper, mustard and thyme. In a medium bowl whisk together the eggs, egg whites and evaporated milk.

Sprinkle the cheese into the pie crust. Top with the mushroom-onion mixture and pour the egg mixture on top. Reduce oven temperature to 350 degrees F. Bake for 35 minutes or until knife inserted in the middle comes out clean. Let stand for 5 minutes before cutting into 6 wedges and serving.

Notes/Results: Really good, and even better reheated the next day. The smoked Gouda, grated and sprinkled on the crust before the filling was added, was perfect with the caramelized onions and the asparagus. I really liked the crust with the oats and it was tender, (I thought I might be struggling to cut it). The filling was good, I think the mustard really adds a nice touch. Halving it, I did have a bit of crust and some egg mixture left over but not quite enough crust for a third tart. Tyler's salad has all of my favorite herbs in it and is crisp and refreshing, perfect to accompany the quiche for a light lunch or dinner. I did add a bit of baby arugula to the salad and serve it on the side. I would make both recipes again. 

Thanks Megan for a fun pick! You can see who "took the challenge" and made a quiche at the challenge round-up at the beginning of May on the Tyler Florence Friday site here.

Sunday, April 26, 2009

Colombian Chicken Soup for Souper Sunday and A Souper Sunday Announcement

Flipping through May's Food & Wine, there was something about this Colombian Chicken Soup that caught my eye; maybe it was the asparagus or little rounds of corn, or the chunks of potatoes, or the cilantro and cumin flavored broth or fact that it is topped with yogurt, avocado and of all things, my beloved capers. Whatever the reason, it made its way to the top of my "to make" list for Souper Sundays.  Inspired by Reeni's homemade baked Spicy Chile Chips last week, I made my own with chili powder, cumin, garlic salt, onion powder, sea salt and pepper


Food & Wine says: "The Good News: Chicken breast adds plenty of protein but not much fat to this version of ajiaco, a cilantro-scented chicken soup that's virtually Colombia's national dish. Stirring in fiber-rich brown rice turns the soup into a satisfying one-dish meal." 


Colombian Chicken Soup
Food & Wine, May 2009
(Makes 6 Servings)

2/3 cup short-grain brown rice
1 1/3 cups water
salt
1 whole skinless chicken breast on the bone (about 1 1/2 pounds)
1/2 cup thinly sliced scallions (about 3)
2 garlic cloves, smashed
2 shucked ears of corn, each cut into 6 rounds
1/2 tsp ground cumin
1/2 cup plus 2 Tbsp chopped cilantro
8 cups low-sodium chicken broth
freshly ground pepper
1/2 lb white potatoes, peeled and cut into 3/4-inch cubes
1/2 lb thick asparagus, cut into 1-inch lengths
1 Hass avocado, diced
1/4 cup plus 2 Tbsp fat-free yogurt
1 Tbsp drained small capers

In a small saucepan. cover the rice with the water and bring to a boil. Reduce the heat, cover and simmer until the rice is tender, 35-45 minutes. Remove from the heat and let stand for 10 minutes, then fluff with a fork. 

Meanwhile, in a large saucepan, combine the chicken, scallions, garlic, corn, cumin and 1/2 cup of the cilantro with the chicken broth. Season with salt and pepper and bring to a boil. Simmer the broth over moderately high heat until the chicken is cooked through, about 12 minutes. Transfer the chicken to a plate and let cool slightly. Pull the meat off the bones and shred. 

Strain the broth and return it to the saucepan. Return the corn to the broth and discard the remaining solids. Bring the broth to a boil. Add the potatoes and simmer over moderately-high heat until nearly tender, about 8 minutes. Add the asparagus and simmer until the potatoes and asparagus are tender, about 5 minutes longer. Return the shredded chicken to the pot and season the soup with salt and pepper. 

Ladle the soup into bowls and garnish with the avocado, yogurt, capers, brown rice and remaining 2 tablespoons of cilantro.

Make Ahead: The cooked brown rice and the soup without the garnishes can be refrigerated separately overnight.

One serving: 336 cal, 9.6g fat, 2g sat fat, 35g carb, 6.6g fiber. 


Notes/Results: Really good. Although the combination sounds a bit odd, the flavors come together well. The soup itself is mild in flavor so having the tang of the yogurt and capers really makes the soup. I mostly stuck to the recipe as written with the exception of using the meat from a previously roasted chicken, instead of cooking it in the broth and using long grain brown rice, which is what I had on hand. I also found that squeezing some lime into the soup made it even better. The slightly spicy and crunchy chips were a nice pairing. One note, although it looks great, corn rounds are a little difficult and messy to eat with a spoon so you may want to consider scraping the kernels off the cobs before putting them in the soup.


Lets see who we have in the Souper Sunday Kitchen this week.
 

First up and new to Souper Sundays is LK from Healthy. Delicious., who joins us from Albany, New York. The inspiration for her Navy Bean Soup with Guinness and Cheddar Biscuits, was Mystery Ingredient Challenge, involving ham, rosemary and beer. although not sure originally how the soup would turn out, she was pleasantly surprised with the delicious taste and how nicely the biscuits soaked up the broth. Welcome LK!


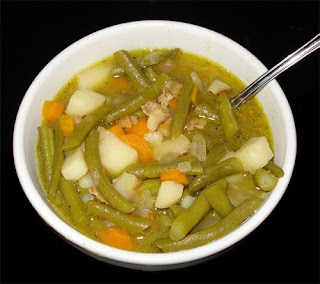
Kim from Ordinary Recipes Made Gourmet has had a busy week, even publishing an appetizer eCookbook among other things. Still she had time to whip up a soup for this week. Not a veggie fan when she was young, green beans being the exception, and her Mom's Green Bean Soup always managed to put a smile on her face. She has recreated this special recipe for Super Sunday, in honor of her Mom and all the memories of being in the kitchen with her.


A freezer clean out and a vow to use up what ingredients they had available, had Debbie from The Friday Friends, searching through her notebooks to find the right soup recipe. She found a this Ham and Bean Soup from her friend Mitzi. Debbie loves both how delicious and how easy to make this recipe is as well as how making recipes from far-away friends and loved ones can make you feel closer. 


Winds, rain and power outages are no match for a good hearty soup, and that's just what Natashya from Living in the Kitchen with Puppies had waiting for her husband's long commute home. She tried nutritionist and healthy chef Ellie Kriger's Sweet and Spicy Peanut Soup and after doubling the spices, (much as we love herwe agree Ellie needs to add more spices to many of her recipes), she had a simple, healthy and tasty soup.


Just back from vacation means plenty to do and catch up on like laundry, gardening, etc., so Ulrike from Küchenlatein needed a simple, no-fuss soup. She found one in this slow cooker Broccoli Soup with Garlic and Olive Oil. Seasoned with her home-grown lemon thyme, and pureed enough that her sons, not fans of broccoli would eat it, the soup was a perfect hearty, healthy dinner.


A case of pomegranate juice and a lot of creativity resulted in a Sweet and Spicy Chili by Heather at girlichef this week. Flavored with the pomegranate juice, peppers, allspice, star anise, and other spices, gave the chili a spicy kick as well as a warm, not cloying sweetness. Heather says that all the beans and chunky cuts of veggies make it "a feast for the eyes and the soul...as well as being satisfying to the tummy."  Yum!


Another week with more delicious and satisfying soups. Thanks to everyone who participated this week! And thank you or mahalo to all of you who join in or come by to see the wonderful soups everyone makes and comment on them.

-------

Souper Sunday Announcement!

As I mentioned last week, the weather is getting warmer and while for many of us soup is a year-round dish, I get lots of comments that people are making less soup this time of year. Because I enjoy the community that has been created when we gather around soup, I would like to keep it going and I thought it might be fun to open things up a bit; so I'd like to introduce Souper (Soup, Salad and Sammies) Sundays. (Yes, I believe the more alliteration in a name, the better it is!)

Although the Souper Sunday name will remain and soup will still be a major player, (and what I make most often since about 40-50% of all of my saved and tagged recipes are soups!), salads and sandwiches, or "sammies", are excellent companions to soup and also great and easy meals that I find myself making frequently. 

Beginning next week, you can send a soup, (or stew, chili or soup-like creation), a salad, (greens, fruit, pasta; you name it!) or a sandwich (bread, wrap, pitas, etc.), or any combination of the above to Souper Sundays. What can't you send? Oh, I don't know, maybe a leg of lamb--unless it is in a bowl with broth, on top of lettuce or between two pieces of bread! ;-)  Otherwise, it's pretty open. This way we can still celebrate the soup we all love but see some creative salad and sammie recipe ideas too. We will try it out for the next few months and if everyone likes it, we will keep it going year round. Let me know your thoughts and I'll be updating the Souper Sunday, now Souper (Soup, Salad and Sammie) Sunday details page to reflect the changes.


Have a great week and I hope to see you here next week with your favorite soup, salad, sammie (or a combo) recipe!

Friday, April 24, 2009

Chicken with Lemon, Garlic & Fresh Bay Leaves and Lemon Roasted Fingerling Potatoes for Tyler Florence Fridays


About once a month, they have fresh bay leaves at the farmer's market, for $2.00 for a large stem and I like to buy one occasionally, dry it out on top of my fridge and use the dried leaves in my soups and stews. 


I have not cooked often with the fresh leaves so Tyler's recipe for a roasted Chicken with Lemon, Garlic and Fresh Bay Leaves seemed like a good one to try. The fact that he had it paired with Lemon Roasted Fingerling Potatoes was a bonus. I found the recipe on Oprah's site (here). 


Chicken with Lemon, Garlic and Fresh Bay Leaves

Recipe created by Tyler Florence
(Serves 4–6)

1 large free-range, organic chicken
1 lemon, cut in half
1 head garlic, cut through the equator
1 branch fresh bay leaves
1/2 bunch fresh thyme
Kosher salt
Freshly ground black pepper
Extra-virgin olive oil

Clean chicken and season cavity well with plenty of kosher salt and freshly ground black pepper. Stuff cavity with lemon, garlic, thyme and bay leaf, then tie bird up with kitchen twine. Rub outside with olive oil, and season with salt and pepper.

Roast in 350° oven for 60 to 75 minutes until golden brown and juices run clear. Cook lemon-roasted potatoes under the chicken in a roasting pan, placed so it can catch the chicken drippings as it cooks.


Lemon Roasted Fingerling Potatoes
Recipe created by Tyler Florence
(Serves 4–6)

1 pound fingerling potatoes
1/2 Meyer lemons, cut into quarter wedges
1 sprig rosemary, leaves only
2 sprigs thyme, leaves only
Kosher salt
Freshly ground black pepper
Extra-virgin olive oil

Wash and split finger potatoes lengthwise. Toss in olive oil together with rosemary, thyme and lemon wedges in a flat roasting tray. Season with salt and freshly ground pepper, then roast under the rotisserie chicken for 25 to 30 minutes until golden brown. Stir occasionally to coat in chicken drippings and cook evenly. Season one more time with salt and pepper before serving.


Notes/Results: Good. At the end of the day it is a basic roast chicken that is well flavored with the garlic, lemon, thyme and bay. I wouldn't call it really special, or go to great lengths to find fresh bay to make it, but if you have the bay available it is a nice recipe to try. Personally, I would roast the chicken at a higher temperature, (at least 400 degrees) next time, instead of the 350 degrees the recipe calls for as I like the flavor of the chicken when the skin gets a bit darker and crisper. The lemony, herbed potatoes (no fingerlings were available so I used some small white potatoes, cut in wedges), were actually my favorite part and they made a great dinner with the chicken and a salad with fresh local greens and strawberries and topped with goat cheese and toasted pine nuts. The leftover chicken is going into soup for Sunday and the leftover potatoes made an excellent breakfast the next day, reheated in a pan, with a little olive oil, crispy prosciutto and green onions.


You can see what the other Tyler Florence Friday participants made and what they thought of their choices at the round-up at the TFF site here.

Thursday, April 23, 2009

A Healthier Croque Monsieur (Believe It Or Not!)--Barefoot Bloggers

I really think I could have a full time job, living in Ina's barn and following her around, just slashing the fat and calories from her recipes. I am sure I could add years to Ina and Jeffery's lives by just some simple substitutions that still taste great. Case in point, the Croque Monsieur, selected by Kathy of All Food Considered, I swear my arteries hardened just reading the recipe. Now I am by no means a perfect healthy cook and eater; I have my indulgences as well as my slip-ups, and I even enjoy the occasional grilled cheese sandwich, but something about slathering it in full fat butter, cheese and milk, just seemed to put it over the edge for me and the way I have been trying to eat lately. Also, I really enjoy the challenge that Ina's delicious recipes give me to make them lighter, while still keeping the great taste and as much within the "spirit" of the recipe as possible. In this case, that meant not giving up the decadent  "ooey-gooeyness" factor of Ina's recipe, but still making it a much healthier choice. 


I was stumped for a bit with this one, but I was flipping through the latest Clean Eating Magazine and found a recipe for Clean Mac 'n' Cheese by Devin Alexander. Having caught her Healthy Decadence show on FitTV a few times, I find her to be a bit perky and chirpy for my taste but she has some great ideas for cutting fat and calories from comfort-style food. In this case she makes the base for the Mac 'n' Cheese sauce out of non-fat milk and brown rice flour, which thickens well and doesn't have a gritty aftertaste and there is no butter needed. She also used a light Swiss Cheese, combined with low-fat Cheddar to make the sauce rich and cheesy. I thought I could take her ideas and adapt them for this sandwich. For my sauce, I decided to use 2/3 non-fat Swiss and 1/3 of the Gruyere, Ina's recipe called for. I subbed out the ham and added some Applegate Farms Organic Turkey Breast (I used the smoked one to get a more similar flavor to the ham), and used a multi-grain boule bread, with the crusts left on, (I like a good chewy crust!), and added some peppery arugula to get something green on there. Finally I made one sandwich for portion control and cut the total amount of cheese and cheese sauce on the sandwich down a bit. My changes are in red below and the taste test and the calorie/fat savings verdict are in the Notes/Results section. 

You can find Ina's recipe in the Barefoot in Paris cookbook (pg 48) and at the Food Network site, here.


(A Healthier) Croque Monsieur
Barefoot in Paris, Barefoot Contessa
(Makes 4-8 Servings)

2 tablespoons unsalted butter (omit)
3 tablespoons all-purpose flour (substitute brown rice flour)
2 cups hot milk (non-fat)
1 teaspoon kosher salt
1/2 teaspoon freshly ground black pepper
Pinch nutmeg
12 ounces Gruyere, grated (5 cups) (use 1/3 Gruyere and 2/3 Non-fat Swiss Cheese)
1/2 cup freshly grated Parmesan
16 slices white sandwich bread, crusts removed (multi-grain sourdough boule with crusts)
Dijon mustard
8 ounces baked Virginia ham, sliced but not paper thin (substitute smoked turkey breast)

Preheat the oven to 400 degrees F. 

(Cheese Sauce Ina's way): Melt the butter over low heat in a small saucepan and add the flour all at once, stirring with a wooden spoon for 2 minutes. Slowly pour the hot milk into the butter–flour mixture and cook, whisking constantly, until the sauce is thickened. Off the heat add the salt, pepper, nutmeg, 1/2 cup grated Gruyere, and the Parmesan and set aside

(Cheese Sauce my way, adapted from Devin Alexander, Clean Living): Put rice flour in a small bowl and slowly whisk in enough milk to form a paste. Then add remaining milk, whisking as you do, making sure that no lumps remain. Place a medium, non-stick saucepan over medium heat and add flour-milk mixture. When milk is warm, add all grated cheeses and stir quickly and frequently with a wooden spoon until the cheese is completely melted and incorporated, the mixture begins to thicken and is warmed through. Add salt, pepper and nutmeg, set aside. (Note: If sauce should happen to separate, place in a food processor  or blender and process until smooth and combined, then place back in pan and finish warming).

To toast the bread, place the slices on 2 baking sheets and bake for 5 minutes. Turn each slice and bake for another 2 minutes, until toasted.

Lightly brush half the toasted breads with mustard, add a slice of ham (or two slices turkey) to each, and sprinkle with half the remaining Gruyere (Gruyere/Non-fat Swiss combo). Top with another piece of toasted bread. Slather the tops with the cheese sauce, sprinkle with the remaining Gruyere (cheese combo), and bake the sandwiches for 5 minutes. Turn on the broiler and broil for 3 to 5 minutes, or until the topping is bubbly and lightly browned. Serve hot.


Notes/Results: Deliciously decadent. The cheese sauce was thick, rich, creamy and very cheesy. The bread was chewy and good and I even managed to put 2 ounces of turkey in the sandwich, instead of the 1 oz of ham Ina's recipe called for, still for less calories and fat. In fact when I did a quick tally of both the calories and fat from the meat and cheese, (not knowing exactly what bread Ina used, I left it out of the equation), I found I shaved over 80 calories from each sandwich and more importantly well over half of the fat. That's enough for some guilt-free chocolate indulgence later! (I like to save my fat/calorie splurges for my favorite things). Even served with a simple salad, it did not feel like a "light' dinner and if I didn't mention the changes I made, I doubt anyone would ever suspect I was giving them a lightened up version. Although it has been awhile, I have had a couple Croque Monsieurs before, and I think this one was just as good. (It always helps to start with a good base recipe which Ina always provides). Although it was still so rich that I don't think I would make it often, it was a really yummy sandwich. I only wish the pictures turned out better. I was more interested in eating my sandwich hot, than plating it and getting a good shot!


Thanks Kathy for a great pick! I really had fun experimenting with this one and was very happy with how it turned out. You can see how the other Barefoot Bloggers liked this recipe at the BB site here.

Wednesday, April 22, 2009

It's Earth Day: Let's Celebrate the Radish with 3 Different Recipes

Sometimes the Farmer's Market can be dangerous for me and my wallet. I get seduced by the gorgeous fruits, vegetables and other things they have for sale and want to keep stuffing them into my bag. (After paying of course!) Like this perfect bunch of radishes. Aren't they gorgeous? So bright and red and spring-like!


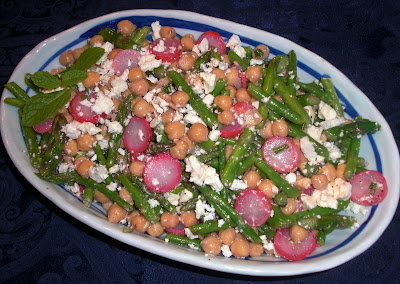
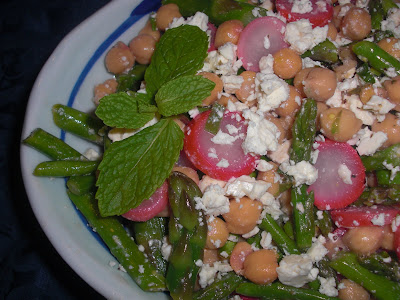
And frankly, I don't even like radishes. I have always found them too sharp and bitter tasting. But one perfect little bundle ended up in my tote. I went through a stack of my healthy cookbooks to find a recipe that might make me like them more, and finally found one for Roasted Radishes in Fresh Every Day by Sara Foster. I had never thought about roasting radishes before, but it makes sense that it would "sweeten" and mellow them out. I decided to roast my little bunch, eat some, and add some to an Asparagus and White Bean Salad with Feta and Lemon Dressing, that I found in another cookbook in the stack, Farmer John's Cookbook, The Real Dirt on Vegetables. This book has tons of seasonal produce recipes from Angelic Organics, a community sponsored farm. The salad looked like the perfect dish for my contribution to a last minute dinner party. In the same book was a recipe for Radish Greens with Miso Sauce and in honor of Earth Day, I thought it was a good idea to reduce my waste and use my entire bunch of radishes, greens and all!


Sara Foster says: "Radishes are almost always eaten raw as crudites or in a salad. But roasted, they're like a sweet young turnip. You can get radishes all year round at grocery stores, but they're especially good in the springtime, when you'll find them in all different sizes and colors at farmer's markets."


Roasted Radishes
Fresh Every Day, Sarah Foster
(Serves 4 to 6)

1 pound radishes, such as icicle, French or Easter egg-colored radishes, tops on (2 bunches)
2 Tbsp unsalted butter, melted
2 Tbsp olive oil
Leaves from 3 or 4 fresh thyme sprigs (about 1 Tbsp), plus more for garnish
Sea salt and freshly ground  black pepper to taste

Preheat oven to 400 degrees F. Trim the tops off the radishes, leaving about 1/2 inch of the green stem attached; reserve the radish greens for garnish. Rinse the radishes and the tops well.

Pit the radishes on a baking sheet with sides or an ovenproof skillet. Drizzle with the melted butter and olive oil, sprinkle with the thyme, salt, and pepper, and toss to coat evenly. Roast for 10 to 15 minutes, until the radishes are tender but still slightly crunchy (red radishes will turn pale pink in color, lighter radishes will become pale golden). Transfer to a serving platter, garnish with the radish greens and thyme leaves, and serve warm.

Notes/Results: Yum! Guess what? Roasted radishes are pretty darn good. So good in fact, I want to buy another bunch or two this week and make some more. I used olive oil and a bit of balsamic instead of butter and they were a great combination. Still crunchy but slightly sweet, they are great on their own, or in other dishes. Sara Foster recommends them in a salad with spiced pecans, and arugula, which I am going to try next. I will never look at a radish in the same way again!


Asparagus and White Bean Salad with Feta and Lemon Dressing
Farmer John's Cookbook, Farmer John Peterson and Angelic Organics
(Serves 4)

1 pound asparagus, cut on an angle in 1-inch pieces (about 3 cups)
1 Tbsp extra virgin olive oil
2 tsp freshly squeezed lemon juice
1 tsp chopped fresh mint
1/2 tsp freshly grated lemon zest
1/4 tsp salt
1/8 tsp freshly ground black pepper
1 cup cooked or canned white beans, drained and rinsed (I used Garbanzo Beans)
1/2 cup crumbled feta cheese
1/2 cup thinly sliced radishes
2 Tbsp thinly sliced scallions

Place the asparagus in a steamer basket, set over 1 1/2 inches boiling water, and cover. Steam until the spears are tender-firm, 4-7 minutes depending on thickness. Drain and place in an ice water bath (or under cold, running water) for a moment to stop the cooking.

Put the olive oil, lemon juice, fresh mint, lemon zest, salt, and pepper in a small bowl and whisk until well combined. Drain asparagus.

Combine the beans, feta, radishes, and scallions in a large bowl. Add the asparagus pieces. Pour on the dressing and gently toss. Serve at room temperature or chilled.


Notes/Results: This salad is delicious and perfect for spring. I went ahead and made a double recipe because I was taking it to share at a party. Because I didn't have white beans on hand, but had plenty of chickpeas, I used those instead. The recipe doesn't call for the radishes to be roasted but I think it made them so much better. The lemon and mint in the dressing compliments the asparagus and beans and makes the salad feel light. It was a big hit with everyone at dinner too.


About the radish greens, Farmer John's Cookbook says, "This recipe is a take on a classic from Japan that uses daikon radish greens." 

Radish (or Turnip) Greens with Miso Sauce
Farmer John's Cookbook, Farmer John Peterson and Angelic Organics
(Serves 2)

1 bunch radish (or turnip greens or both)
1 Tbsp miso paste
1 Tbsp peanut oil
sugar
1 tsp toasted sesame oil
2 cups hot cooked rice

Bring 2 cups of water to a boil in a medium pot. Add the greens and boil for 1 minute. drain the greens in a colander and run cool water over them to stop the cooking. Let drain again, then gently squeeze out any excess water with your hands. Transfer the greens to a cutting board. Chop finely and set aside.

Put the miso paste in a small bowl. Stir in 2 tablespoons water, then add a little more water so that the miso is thinned just enough to stir into other ingredients.

Heat the peanut oil in a large skillet over medium heat. Add the chopped greens; cook stirring, until they are tender and heated through. Add the thinned miso paste. Add sugar to taste; stir the ingredients until thoroughly combined. remove from heat; stir in the toasted sesame oil. Serve over rice.

Notes/Results: Good. The miso sauce gives a nice flavor to the greens and it tasted great over the brown rice I served it with for a nice healthy lunch. I topped it with a garnish of toasted sesame seeds for a little crunch factor. One note, I know my bunch of radishes was pretty small but I think you would need at least two bunches for two people. Maybe they were thinking about the turnip greens which are bigger, when they wrote this recipe. I really liked the sauce and plan on using it for my weekly huge bag of kale and greens from my CSA box too.


Project radish was a success! I liked all three of the dishes I made, they were all healthy and I found that with the right preparation, I can now add radishes to my "like" list. In keeping with Earth Day, all of the vegetables and the lemon, mint and thyme were all locally grown and I used my entire bunch of radishes too. A bonus, I can now also add two more cookbooks to my Cook From Every Book Initiative list--working through those stacks slowly but surely. I feel so virtuous now, I'm going to go eat some chocolate! ;-)

Happy Earth Day!